Share "Transform Your Wood Deck: The Ultimate Guide to Staining and Sealing"
A wood deck can be a beautiful extension of your home, providing a perfect outdoor space for relaxation and entertaining. However, to keep your deck looking its best and to extend its lifespan, regular maintenance, including staining and sealing, is essential. Here's a comprehensive guide to help you through the process of staining and sealing your wood deck.
Why Stain and Seal Your Deck?
Staining and sealing your deck offer several key benefits:
- Protection: Prevents water damage, UV damage, and mildew growth.
- Aesthetic Appeal: Enhances the natural beauty of the wood and adds color.
- Longevity: Prolongs the life of your deck by preventing cracking, splintering, and warping.
Step 1: Prepare Your Deck
Preparation is crucial for a successful staining and sealing project. Follow these steps to ensure your deck is ready:
- Clean the Deck:
- Sweep: Remove all debris, leaves, and dirt.
- Wash: Use a deck cleaner or a mixture of soap and water to scrub the surface. For tough stains or mold, a pressure washer can be effective. Allow the deck to dry completely before moving to the next step.
- Repair Any Damage:
- Inspect the deck for any loose boards, nails, or screws and fix them.
- Sand any rough spots or splinters to create a smooth surface.
- Strip Old Finish (If Necessary):
- If your deck has a previous stain or sealant, you might need to use a deck stripper to remove it. Follow the product instructions carefully.
Step 2: Choose Your Stain and Sealer
Selecting the right stain and sealer is crucial for both the look and protection of your deck. Consider these options:
- Types of Stains:
- Transparent Stains: Provide minimal color but highlight the natural grain of the wood.
- Semi-Transparent Stains: Offer a bit more color while still showing the wood grain.
- Solid Stains: Provide the most color and coverage but hide the natural grain.
- Types of Sealers:
- Water-Based Sealers: Easy to apply and clean up, but may not last as long as oil-based.
- Oil-Based Sealers: Penetrate deeper into the wood for longer-lasting protection but require more cleanup effort.
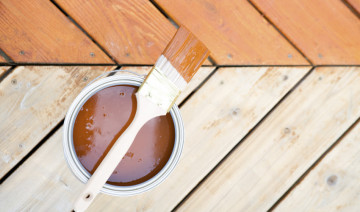
Step 3: Apply the Stain and Sealer
With your deck prepared and your products selected, you can now apply the stain and sealer. Here’s how:
- Check the Weather:
- Ensure the weather forecast is clear for at least 48 hours with temperatures between 50-90°F. Avoid staining in direct sunlight to prevent the stain from drying too quickly.
- Apply the Stain:
- Tools Needed: Use a high-quality brush, roller, or a sprayer designed for staining.
- Method: Start with the railings and then move to the deck boards. Apply a thin, even coat of stain, following the wood grain. Work in small sections to avoid lap marks.
- Apply the Sealer:
- Once the stain is completely dry (check the manufacturer's instructions for drying times), apply the sealer using the same method as the stain. Ensure even coverage and avoid pooling.
Step 4: Let It Dry
Allow the stain and sealer to dry completely before using the deck. This usually takes 24-48 hours, depending on the weather and the products used. Avoid walking on the deck during this time to prevent any marks or uneven finishes.
Maintenance Tips
To keep your deck looking its best, follow these maintenance tips:
- Regular Cleaning: Sweep and wash your deck regularly to prevent dirt buildup.
- Inspect Annually: Check for signs of wear and reapply stain and sealer as needed, typically every 2-3 years.
- Protect from Furniture: Use protective pads under furniture legs to prevent scratches.
Conclusion
Staining and sealing your wood deck is a rewarding project that can significantly enhance its appearance and durability. By following these steps and maintaining your deck regularly, you can enjoy a beautiful, functional outdoor space for years to come. Need supplies or expert advice? Visit our store to find everything you need for your deck staining and sealing project. Happy DIYing!